Rennovations complete!

Rennovations Complete!
 
   A good friend of mine from Robert Morris University, named Grant Miller II, and I have been working with each in other this summer in order to help me clean up my social media, so that I can prepare for internship mode during the next academic year. I am a Software Engineer major, with dreams and aspirations to create video games in the future, or to create business applications. One of the requirements for graduation is to do a for-credit software engineering internship. In order to maximize my exposure and online/professional presence, I have created various social media throughout the years in order to prepare for the fateful day that I would have to find an internship or real job.

RMU University Logo

      During Summer of 2012, before enrolling into the university as a community college transfer student, I replaced my deprecated software engineering hobby site, the ProgLog at Tripod.com, with a new Google Sites, called EagleSoft Ltd. The older site, which was coded by hand in HTML, became too cumbersome to maintain, and the host site (Tripod.com) was beginning to break in my primary web browser. The new site is to serve as my depository for my software engineering projects, and to act as my software engineering portfolio website. Unfortunately, I went overboard with the original content on the site, and the site was poorly structured in terms of design.

   During my first year during the 2013-2014 academic year at Robert Morris University, I finally met some supportive and honest new friends, including Grant Miller, through the Epsilon Tau Pi fraternity on campus. One year later from the original launch of EagleSoft Ltd, during this summer of 2014, Grant Miller and I finally redesigned the theme, structure, and content of EagleSoft Ltd, so that the site could be professionally presentable to employers.

Current appearance of EagleSoft Ltd

  Not only did I create a website (The ProgLog) in the past, but I also had a corresponding blog called T's Geekware. Unfortunately, I posted poor quality content on that blog, and it also was removed when the Tripod account was removed for the older ProgLog website. During summer of 2013, I created a new blog to complement EagleSoft Ltd, called EagleSoft Labs. This blog, too, was somewhat poorly designed in terms of style; however, it had (and still has) better content. One year later, during this summer of 2014, Grant Miller and I redesigned the blog.

   The blog now has a simple blue and black theme, which is similar in style to EagleSoft Ltd, a blog archive, a blog label list, an about me page, and a Google+1 button. Also, the text fonts, and general style and appearance have been greatly improved, for professional appearances. Furthermore, the micro blog at the EagleSoft Ltd website, which was used to post news, has been moved/integrated to use a news feed from this blog. Lastly, I have created in the past a LinkedIn page for showing employers my technical skills and expertise. This too was reorganized and great improved by Grant Miller II and I.


  Now with a greater improved appearance, better content, and general overall better organization at my website, blog, and LinkedIn profile, it is my hope that you, either a reader or potential employer, like the new changes, and will enjoy yours visit to my media better.

How do you like the new changes? And what could be improved? Post your suggestions and concerns in the comments below!

Thank you for supporting and visiting EagleSoft Ltd, EagleSoft Labs, and my LinkedIn profile!

Cordially,
Anthony Kinest
Founder of EagleSoft Ltd


BreakGold Editor Released (v1.0)

BreakGold Editor v1.0 Released!

   I finally have created a page for a release of a secret editor that I created for usage in modifying some internal aspects of the BreakGOLD engine, and which is being used with development of the Sonic CD Breakout fan game. Currently, the editor views/rips/replaces internal .raw image art, and allows creation/viewing of .bgh high score files. Many new features are planned for the next release! Also on the page is some game modification notes, and a breakdown of the .bgh file format.

Check out the editor and other information on the project page!
 

An Update

An Update

   During the past week, I have added a Music page under Sega Genesis/CD/32x, which features various VGM chiptune files that I created throughout the years. Also added under the same category are an in-progress page for the Sega Genesis/CD ports of Ultra Air Hockey, an in-progress page for the BasiEgaXorz port of TerryRitchie's SpriteLibrary (called GSpriteLibrary), and more links added to the Link & Friends page. Furthermore, some updates have been made to the Sonic CD Breakout pages.


  Also, I have made some progress with creating GSpriteLibrary, developing the Sega ports of Ultra Air Hockey, and in scripting Sonic CD Breakout. More information and media to be unveiled in a future blog post soon!

--Tamkis,
--Founder of EagleSoft Ltd

Progress on Ultra Air Hockey (Sega homebrew ports)

Homebrew development for the Sega Genesis port of Ultra Air Hockey begins!
 
 
   Only a few months later after the original, PC version of Ultra Air Hockey was released in April, and development for the Sega Genesis/Sega CD ports of Ultra Air Hockey has already begun! The Sega Genesis port of the game is being written with BasiEgaXorz, a TinyBASIC compiler for the Sega Genesis/CD/32x. Graphics are being converted into the tile-based format that the Sega Genesis, music has been converted to the Echo Stream format, for use with the Echo Sound Engine, and sound effects are DAC converted versions of their .wav counterparts from the original/definitive PC version.
 
  So far, everything but the game play itself has been coded, and even then, there are some bugs to fix. Below is a video of progress so far, and a video of a test ROM showing the Echo Sound Engine in action. Game play should be coded within the following months, hopefully to be completed by the end of summer.
 
You can keep track of development at this blog, or as I upload media to the project's corresponding page, on my portfolio/project website.


Stay tuned for more developments!
 
-EagleSoft Ltd
-Tamkis

Demo #3 preview of Sonic CD Breakout

No, it is not dead yet; Sonic CD Breakout is still in development!
 
 
   The previous demo release of this fangame, Sonic CD Breakout, occurred almost half a year ago during the Christmas 2013 season. (If you have never heard about my fangame, go check it out here.) Due to real-life responsibilties (including university life, a job, professional development as a future software engineer/video game designer, and other things), development has slowed with Sonic CD Breakout. However, development has not halted altogether!
 
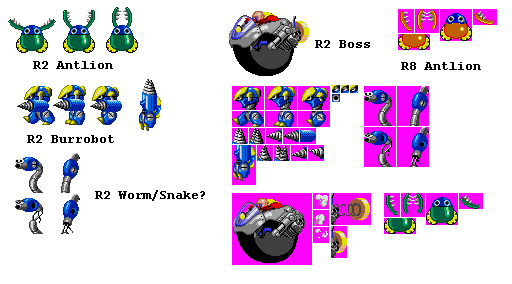
   Sporadically, within the past half year, I have been worked on optimizing the game, and have been working on 2 new rounds: Desert Dazzle Zone (DDZ), and Quartz Quadrant Zone (QQZ). The former is a fan implementation of a scraped level from the 2011 remake of Sonic CD, which was supposed to replace the scrapped Round 2 level from the original 1993 Sega CD version of Sonic CD. In the fangame, I used some fan art from others to make fan created past, good future, and bad future versions of DDZ. The past timezone is based upon an island level, the present based upon Dust Hill Zone from Sonic 2 Beta, the bad future timezone based upon a railroad zone, and the good future based upon an osasis zone. Enemies and the boss from the Desert Dazzle Zone are used in the levels too. (People with fanart to be properly credited in the Demo #3 release)
 
 
Past timezone artwork source
(From a Sonic hack)
 
Present timezone artwork source
(From Esrael's Sonic 2 Delta hacks,
based on scrapped Dust Hill Zone from Sonic 2 Beta)

Bad Future timezone artwork source
(Sunset Park Zone 16-bit remake art)
 
Good Future timezone artwork source
 
Enemies and Boss

 
   The latter is a standard Sonic CD Level, and futures most of the enemies and gimmicks from the original zone.
 
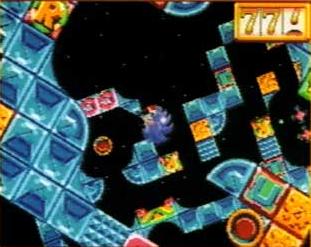
   Also in development are a fan recreation of the Sonic CD Beta Special Stages, which appear to be based upon the Sonic 1 Special stage concept, with layers that can be traversed, similar to the Knuckles Chaotix bonus stage levels. I designed the special stage levels to be like stationary Sonic 1 special stages (even some of its ripped art), but with bricks that let the player go up or down a layer.


  Currently, only the 1st acts of DDZ and QQZ are created, and only a training special stage level is made (for the Training Zone). These levels can be seen in action in the video below. I plan on releasing what I have as Demo #3 for Act 2 of the Sonic Amateur Games Expo (SAGE) 2014.


Stay tuned for more development previews for Sonic CD Breakout summer 2014!
 
--"Tamkis"
(aka Anthony)


Grand Re-opening of EagleSoft Ltd!

   At the beginning of the month of May 2014, EagleSoft Ltd was temporarily closed for renovations. After approximately a week and a half of deliberation and work, a colleague and fellow Eagle Scout (Grant Miller II) and I redesigned the layout and looks of this website, so that it could look presentable and professional as my software engineering portfolio website. We added a set of tabs to the top of the page for site navigation, added featured projects to the home page, and reorganized the files of the website.

   Enjoy the new website, and stay tuned for upcoming projects! We plan on soon performing any aesthetical, content, and layout changes for this blog soon, maybe during the month of July 2014.


-EagleSoft Ltd

Summer rennovations

Well, it is finally here: Summer 2014! 


Finally, with a lot of leisure time available and very little university/real life responsibilities to deal with (other than one uni class and a part-time job), I need to renovate EagleSoft Ltd, and, eventually, its corresponding blog (EagleSoft Labs).
 
Why? For the following reasons:
 
  • I am going Indie, and EagleSoft Ltd, & EagleSoft Labs need to look simple, yet professional! (Something along the lines of spaddlewit.com)
  • I need to get out of the hobbyist mental attitude, and begin gaining professional experience for personal/future employment reasons.
  • Planning for Android development, especially for porting Ultra Air Hockey!
A few university friends and I are working on creating a newer, professional, brand image for Eaglesoft Ltd. Renovations may be complete by the end of June. Sorry for the inconvenience; however, I hope you will return once the changes are finished! Thank you.
 
-EagleSoft Ltd founder,
Tamkis


Ultra Air Hockey Relesed! (PC, v1.0)

Ultra Air Hockey for PC released! (V1.0)
 
 
Ultra Air Hockey for PC was released over spring break during March 2014! You can download it from here. It will be ported to the Sega Genesis/Sega CD over summer 2014. Enjoy, and have fun!


Progress on Ultra Air Hockey (PC)

        Progress for the main/PC version of Ultra Air Hockey currently has been very rapid and exciting! Development of the main/PC version of the game started on January 08, 2014, and is still ongoing (as of the time of this writing, 02/26/14). Up to today, the title screen, main menu, options screen, main gameplay, and sfx/bgm have been coded in. Also, physics, powerups, and controls for player one have been created. Currently, the game is ~75% complete.

   What is left to do for the game is to create a credits screen; fix physics, graphical, and other bugs; create controls for a human player #2, and create AI for the CPU player #2. If everything goes according to plans, the PC version of the game should be complete by early April 2014... however, there are no guarantees on this date, as my University work is getting difficult and time consuming.

   Below is a YouTube video showing a PoC of the current development of the PC version of the Ultra Air Hockey video game. Enjoy! Please post your comments and suggestions for the game here. I am tired of having no audience/followers for my homebrew/indie software, and would like some intelligent human interaction!


   Stay tuned for more developments on Ultra Air Hockey!

-Tamkis

About Ultra Air Hockey

    Currently, I am creating new video game, called Ultra Air Hockey. Ultra Air Hockey is the new and exciting, multi-platform, Air Hockey homebrew/indie video game, coming to your PC, Sega Genesis/Sega CD retro video game consoles, and Android (in the future)! The main copy of the game will be written in QB64GL for Windows PCs, and will utilize QB64's new commands, especially the multimedia commands. After game development is finished for the PC version, the game will be indirectly ported to the Sega Genesis/CD as homebrew software using BasiEgaXors.

Unlike the other boring Air Hockey video games out there, Ultra Air Hockey has various features that make it unique and fun, including:
  • Features
    • 1 and 2 Player modes
    • Difficulty settings
      • Each difficulty has a different length for goal
      • x3 difficulty settings per mode
        • Easy (small goal)
        • Medium (larger goal)
        • Hard (largest goal)
    • Powerups
      • Powerups are collectible by hitting powerup icons with hockey puck
      • Powerup is then kept in reserve until player uses it
      • x 9 powerups
        • Multi puck
        • Big stick
          • Makes your stick x3 bigger
        • Blockade
          • Puts a giant wall in the middle of the table!
        • Slowmo
        • Kill opponent
          • Opponent is taken out of the game until next goal
        • Swap places
        • Fastmo
        • Invisibility mode
          • Makes players invisible for a brief amount of time
        • Bumpers
          • Randomly places x7 bumpers on the table
          • Puck and sticks interact with them!
    • Graphics
    • Music
      • Public domain, classic .mod chiptunes
      • x16 Chiptunes
        • x3 for the difficulty modes
        • x7 for the powerups
        • x3 other
    • Sound effects
      • Realistic, original, exciting sound effects!
      • Creative Common sounds from Freesound.org
      • Announcer proclaimes
        • What the current score is
        • Who is winner
        • Other things
    • High quality, fun game, for family and friends!
Stay tuned on my blog for more updates on development for Ultra Air Hockey!

Plans for 2014

Goodbye 2013, hello new year, 2014!
  
   Christmas break 2013 was not very eventful for me, other than visiting family and relaxing from a long, stressful, but successful university semester. I did get a Ti-89 graphing calculator and an RCA cable for my Atari 130XE from "Santa"! The Ti-89 I will be using for higher-level math classes, as well as for software engineering development, as this calculator has most of the functionality and programming ease which is lacking on the z80-based TI calculators. I have no current plans of software to write for the Ti-89 yet, especially since I am still learning how to use it; however, I may be dealing more with programs written in assembly language. Why? Because the Ti-89 calculator is Motorola 68k-based, which is a processor and an assembly language I am very familiar with, what with a few years of tinkering with the Sega Genesis and a PC breakout engine called Break GOLD, which utilizes Motorola 68k assembly for scripting.

Ti-89 Calculator!

   Currently, the Spring 2014 semester is in session. Although university life and responbilities take up most of my leisure time, I am hoping to have some time to create more software and homebrew/amateur video games. Several projects are underway, including:

  • Ultra Air Hockey (PC, Sega, and someday Android)
  • Tower Tic Tac Toe (Atari 8-bit computer port)
  • Completion on Sonic CD Breakout
=========

Ultra Air Hockey:

Ultra Air Hockey is a multi-platform Air Hockey video game, which is being developed for PC, the Sega Genesis/Sega CD as homebrew, and in the future, Android. You can read more about on my website, and under the "Ultra Air Hockey" topic of my blog.
=========
Tower Tic Tac Toe:

   Tower Tic Tac Toe is an original 3D Tic Tac Toe game, which has a 3x3x3 playing field and powerups. You can learn more about it here and here. I will soon be porting the game from the PC version to the Atari 8-bit computers, in vanilla Atari-BASIC. The sounds and music will be generated from the beeps and boops of the POKEY chip, from Atari-BASIC. This port will be hardest, as it may require an epic rewrite of the code, since Atari-BASIC is DOS-like, and includes line numbers. Also, I am very new at the specifics of Atari-BASIC. The cool part is that I will be able to test this game on my physical Atari 130XE once finished :).
=========

More projects and news will be posted here at Eaglesoft Labs, and, as usual, releases of games and software posted at my EagleSoft Ltd.

--Tamkis

Sonic CD Breakout, Demo #2, RELEASED!

Ho ho ho! Finally! It's here, DEMO #2 of Sonic CD Breakout, just in time for Christmas 2013!


      Due to SAGE (Sonic Amateur Games Expo) 2013 not happening this year, and due to lack of leisure time recently for working on this due to real world things like college, I decided that I should release a demo instead of just sitting on the game. Don't know what Sonic CD Breakout is? It's a Sonic fan game, which is a Sonic CD themed breakout clone, using the BreakGOLD game engine. For more information about the fan game project, see this page. The latest demo can always be downloaded from that page. READ the readme in order to learn how to install the game, because some "assembly" is required.

I am hoping to get a third demo made for Act 1 of SAGE 2014; if not by then, then for Act 2 of SAGE 2014.

Demo #2 Release Video

Enjoy!
(Want to comment on this YouTube video? Do so here, at this blog post!)

Sonic CD Breakout


What is Sonic CD Breakout?

Sonic CD Breakout is a PC fan game developed by me. It is a level set for an old breakout game called Break GOLD!, by Kjell Anderson. The game utilizes a Frankenstein of an Motorola 68k virtual machine and M68k scripts to make things work, and the author created a Level editor for the game, which is included with the full-version of the game. The Sonic CD Breakout level set is, obviously, themed around Sonic CD, a Sonic game made for an add-on for the Sega Genesis known as the Sega CD. It is a fan game which I started over summer 2009, but have worked on sporadically due to high school and now college life. Still, it is a fan game which I am quickly trying to finish. In future posts, I will document and give announcements about its development.
Metal Sonic race, from Sonic CD
Vanilla BreakGOLD Engine
  
A Model 2 Sega CD unit

How to Disassemble the Atari XF551 5.25" Floppy Drive

   When I bought my used Atari 130XE 8-bit computer that I found at a Goodwill store during August 2013, I purchased the whole $40.00 lot/bucket of supplies, which included power cables, SIO cables, and even two Atari XF551 Floppy Disc Drives. Due to my intensive coursework and studies at the University, I have not had much leisure time at the dorm. This intense first college semester at the new, 4-year college ends in 2 weeks, so things will be getting more stressful and intense as the semester comes to its end, and all online shenanigans of mine will grind to a halt next week.


An Atari 130XE computer

      Recently, however, I had some leisure time, especially since I am currently on thanksgiving break for this week, at the time of this writing. One of the things I decided to do with this leisure time was to dissassemble one of my XF551 FDDs. Why did I decide to do this? For two reasons. One reason was to wash out the dust, dirt, and other gunk from the inside and outside of the FDD chassis, and to check if the circuity is physically okay. Another reason was to check if the EEPROM chip of either or both of the two FDDs was socketed or not.

    Later on in 2014, I plan on purchasing an updated firmware chip for the XF551. I have read online on several Atari forums that what the eBay user is selling is indeed legit, especially since he is well known for these firmware chip updates for Atari and older computers. He sells these chips usually 10 at a time, and he sells them in bulk. Bascially, what the new firmware chip does is, after mounting an off-the-shelf, old, internal, 3.25" FDD to the XF551 PCB, is convert the old XF551 FDD, which can only accept ancient 5.25" floppies, to now accept up to 720kb 3.25" floppies (the "modern" common ones)! The 5.25" floppies are the ancient ones which actually flop, by the way. By using existing Windows PC software, such as WriteAtr by Hiasoft, with a USB FDD, this conversion will allow me to write Atari games to common 3.5" floppies, and then begin rapid homebrew development on actual Atari 8-bit hardware! This documentation of the original mod, called the XF351 kit, was written up in an old Atari magazine. Swapping out the chips is much easier to do if the FDD has the firmware chip already socketed (not all units do). I plan on only converting one of the FDDs; the other one will remain stock, in order to accept original 5.25" floppy discs. I still have yet to determine if these drives work.


An XF551 unit

   Anyhow, let's get to business, and I'll show you how to dissassemble and on how to clean a XF551 FDD! I'll eventually record a video walkthrough of how to do this, when I'll dismantle and check out the 2nd FDD. Please excuse the poor picture quality; blame my low quality camera. I used a pen and a screwdriver in the photos in order to point out the screws that need to be removed.

Tools you will need:
  • For physical disassembly
    • Phillips-head screwdrivers, especially long, small ones
    • Piece of paper
    • Pen
  • For cleaning the drive
    • Towel
    • Hair Dryer
    • WD-40
    • Cotton Swabs
1. Optionally, on the piece of paper, draw 3 small circles. For organizational purposes, you may place the appropriate screws in the circles. Label them "Outer Chassis Frame", "Floppy Mech Frame", and "PCB Frame".


2. Turn over the FDD onto its bottom, and, with the screwdrivers, remove the 4 screws on the bottom. Place these 4 screws in the "Outer Chasis Frame" circle on your paper.


3. Then, carefully, turn over the FDD, so that the top is indeed facing upwards. Then, slowly, remove the upper half of the chassis.

4. Once open, you will find two parts: the metalic 5.25" FDD mechanism, and the PCB controller circuit. On the FDD mech, remove the the four screws on the perimeter on the frame, which are flushed to the bottom half of the chassis. Place these screws in the "Floppy Mech Frame" circle on the paper.


5. Carefully remove the white power cable from its socket.


 6. Slowly and carefully, lift the FDD Mech off the chassis, and onto the side outside of the chassis frame. Be careful, beacause the FDD Mech is still attached to the ribbon cable-like thing!


7. Remove the three screws from the controller PCB, and place them on the paper in the circle marked "PCB Frame". (See photos)


(There is a screw inside that hole on the metal frame)

8. Carefully, pull the board away from the back side of the bottom of the chassis, and pull the board up. You need to get the SIO connectors out of the chassis cutout, and the PCB board above the white plastic holders. This takes some time...

(White plastic holders are at tip of pens)


 9. In the bottom left corner of the PCB board, notice the firmware chip and PCB revision text. Note whether the firmware chip is socketed or not (mine is). Also write down on the piece of paper the text on the chip and the Board/Revision number of the PCB. You will need this information later for reference, if you actually decide to do the XF351 upgrade.


10. Inspect the solder joints on both the PCB and on the FDD Mech. Especially check the wire solder joints on the FDD Mech, and the solder joints on on the connectors on the back of the FDD, especially the power jack. Remember, unless you got your FDDs NIB, these FDDs are more than 20 years old, so things shall have worn out! If you are skilled enough (and I am assuming that you are, since you are reading this electronics-based retro guide), add new solder to joints that need them. Also, optionally, lightly and carefully, apply WD-40 to rusty spots on the chassis of the FDD Mech.


(Gosh, looks like that black wire broke off of its solder joint, on the bottom of the FDD Mech! I need to eventually resolder it, if it is not some kind of ground wire. This particular FDD unit kept giving me boot errors, even before I opened it up. This broken wire is probably the cause...)


(The metal on the power jack looks rusty. I need to apply eventually some WD-40)
(Looks like the solder joints on the bottom of the switch and power jack need new solder too...)


(Oxidation! Apply WD-40 lightly!)

11. Take the plastic chassis halves to a sink. Run lukewarm water from the sink's faucet, and quickly but thoroughly clean off the dust, rust, and other mess from the two chassis halves. Also, lightly wet the "air vents" on the top of the chassis. Afterwards, wipe the majority of the reamining water with a towel. Finally, wipe the rest of the water using a cotton swab, and some of it quickly using a hair dryer on warm. Let everything air drive after you are done. Remember, the plastics are more than 20 years old, so do not apply too much heat; it could crack!


12. Do whatever else you want to do (ie, the XF351 upgrade), and then reassemble everything, in reverse order!

===========

   I hope you liked the guide and find it useful. Soon, I will be trying to do that XF351 conversion after purchasing the upgraded firmware chip, as well as diassembling/cleaning out the 2nd FDD. I will post a video walkthrough on when removing the 2nd unit.

Copyright EagleSoft Ltd. Powered by Blogger.